Table of contents [Show]
What is Cosmos Network ?
Cosmos Network is a blockchain network architecture run by Interchain Foundation. The company is headquartered in Zug, Switzerland and was founded in 2016 by Ethan Buchman and Jae Kwon.
The end goal of Cosmos Network was to create an Internet of Blockchains, a network of blockchains able to communicate. At the moment, a blockchain tends to act as its own universe with almost no way to communicate with the world outside of its network, without third-party.
This is why Cosmos Network came to try creating the foundation for a new token economy.
How to stake Atoms using stake2earn 🌜?
1. Access Cosmostation Wallet
Cosmostation Wallet is a completely decentralized mobile wallet developed for users to conveniently and securely interact with the Cosmos Hub without the risk of possibly exposing your account information to external entities. You can use Cosmostation Wallet in the web version or directly downloading the mobile version from App Store or Play Store.
The next steps apply only for the web version.
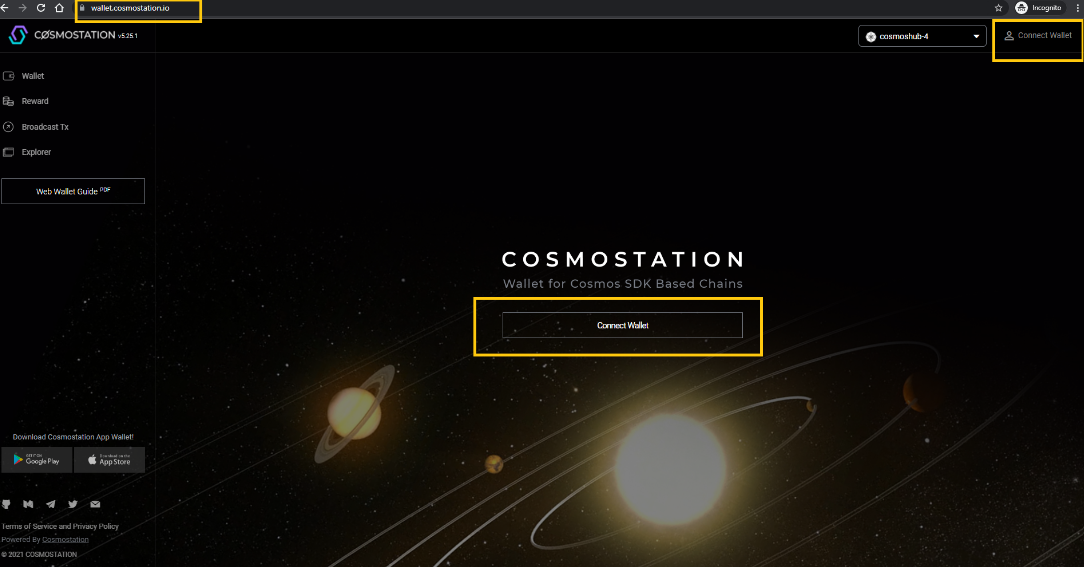
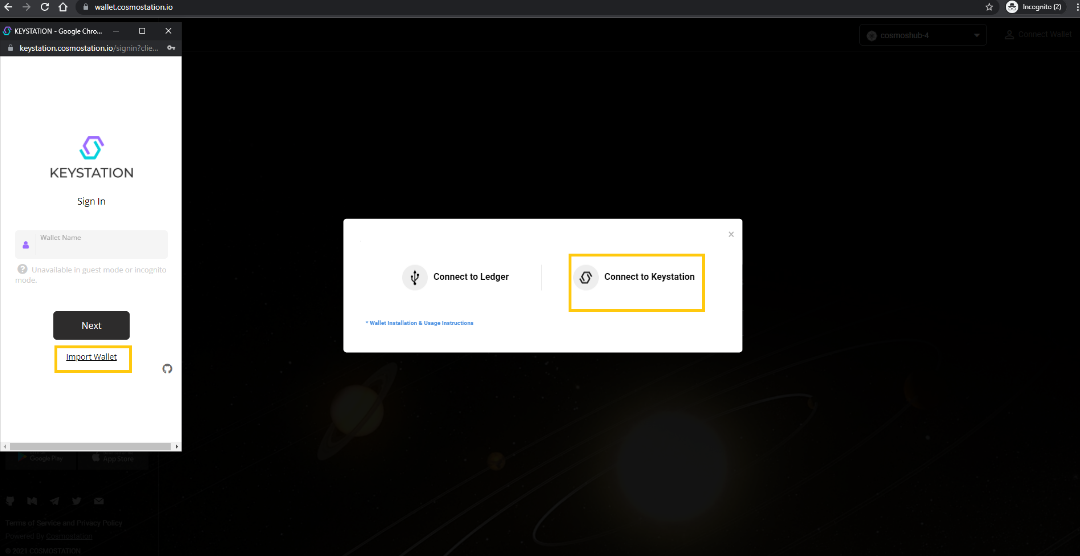
2. Connect your wallet
Now you will be asked to connect to your wallet using Ledger or Keystation. Let's try out the Keystation option and click on ‘Import wallet’:
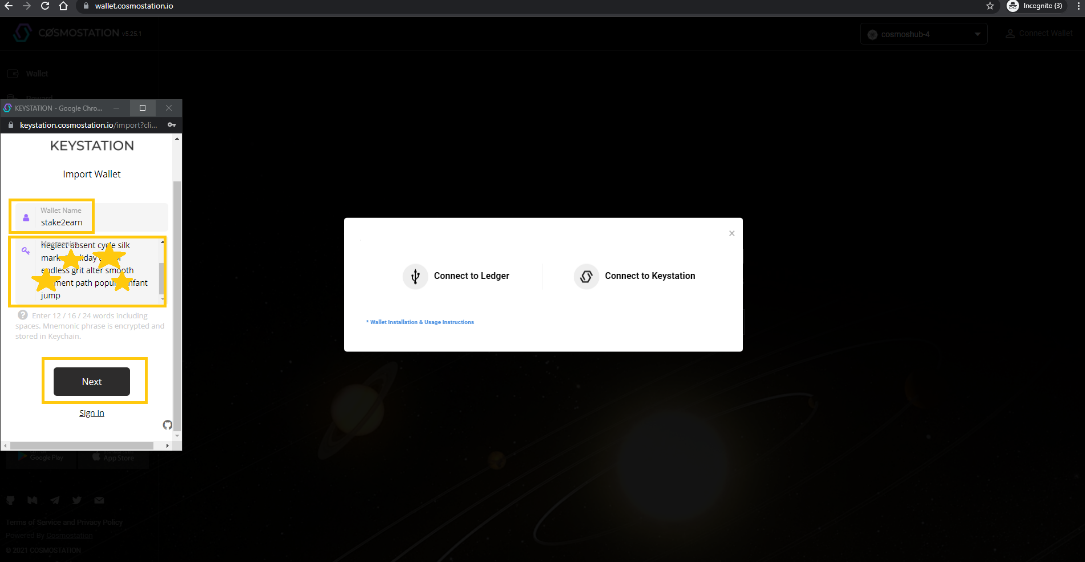
3. Mnemonic verification
You will be asked now to enter your Mnemonic phrase. This is a group of 12, 16, up to 24 words created when a new wallet is made to store your cryptocurrency.
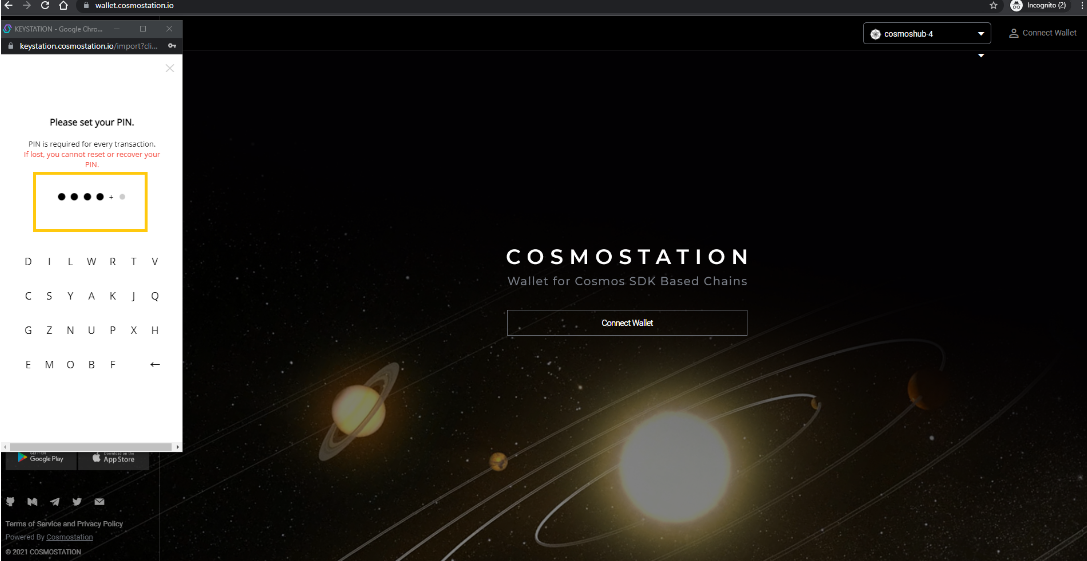
4. Set your PIN
You will be asked to set your PIN which you will have to use every time you want to make a transaction during this session.
Make sure you remember this PIN as it cannot be reset or recovered. If you do forget your current PIN, you can always logout your wallet and next time, you will need to set another PIN. Every session has its own PIN.
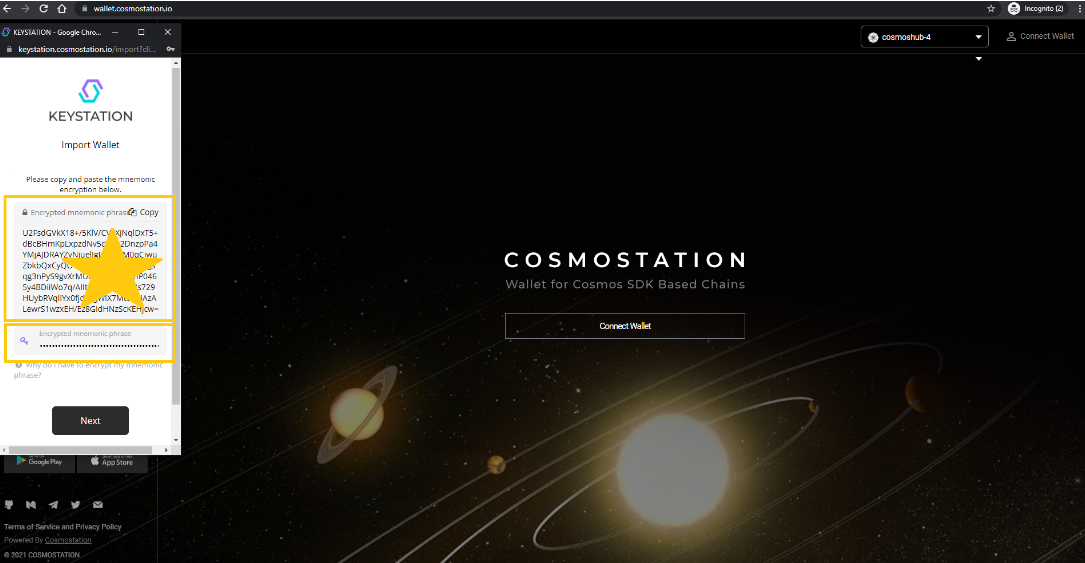
5. Import wallet
Now you will need to copy and paste the encrypted mnemonic phrase received.
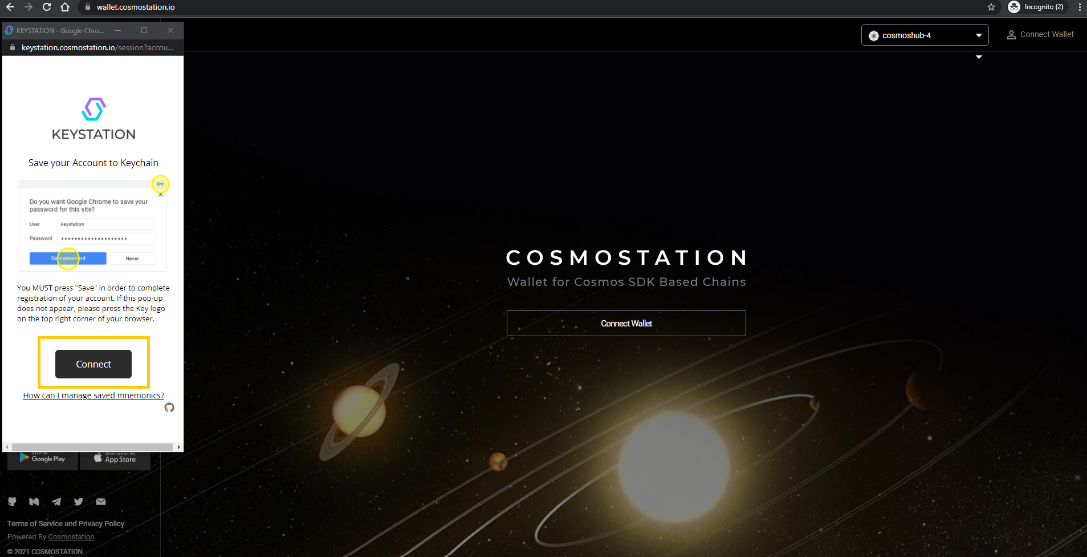
6. Save your account to Keychain
At this stage you will need to save your account in order to complete registration of your account. The next step is to simply click on ‘Connect’ button.
7. Reward stage
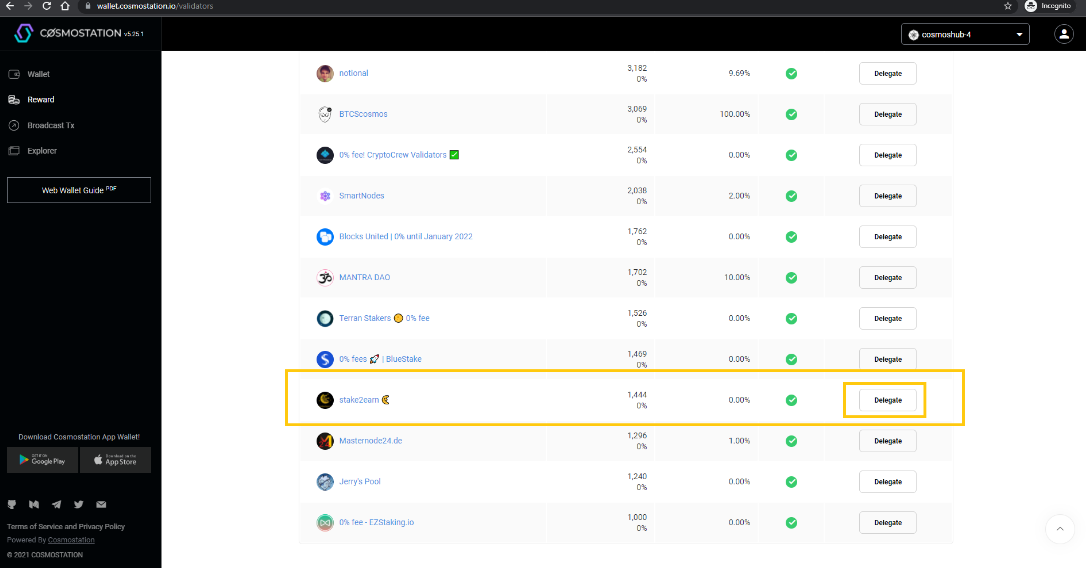
On the left side menu, you will find the option ‘Reward’ which you will need to select.
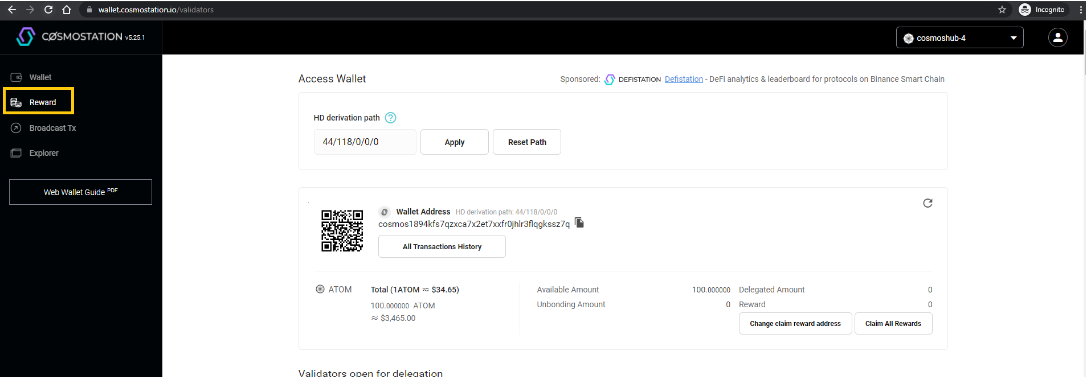
Now simply scroll down until you find stake2earn in the Validators list and click ‘Delegate’ button.
8. Set delegation amount
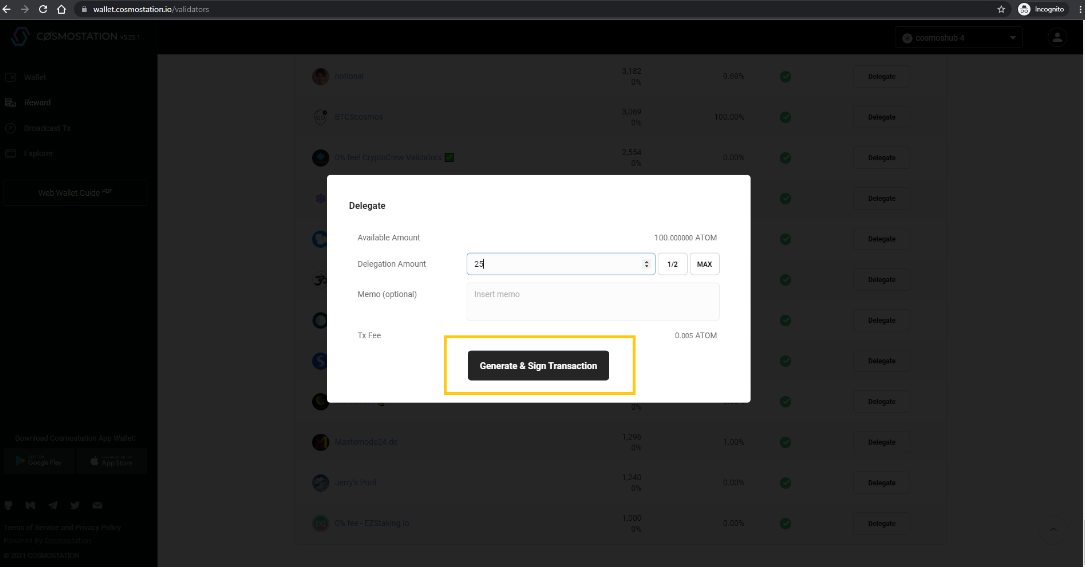
You will be asked now the amount you want to delegate with stake2earn, and then click on ‘Generate & Sign Transaction’ button.
9. Sign Transaction
As mentioned before, every transaction needs to be signed with the PIN you set earlier.
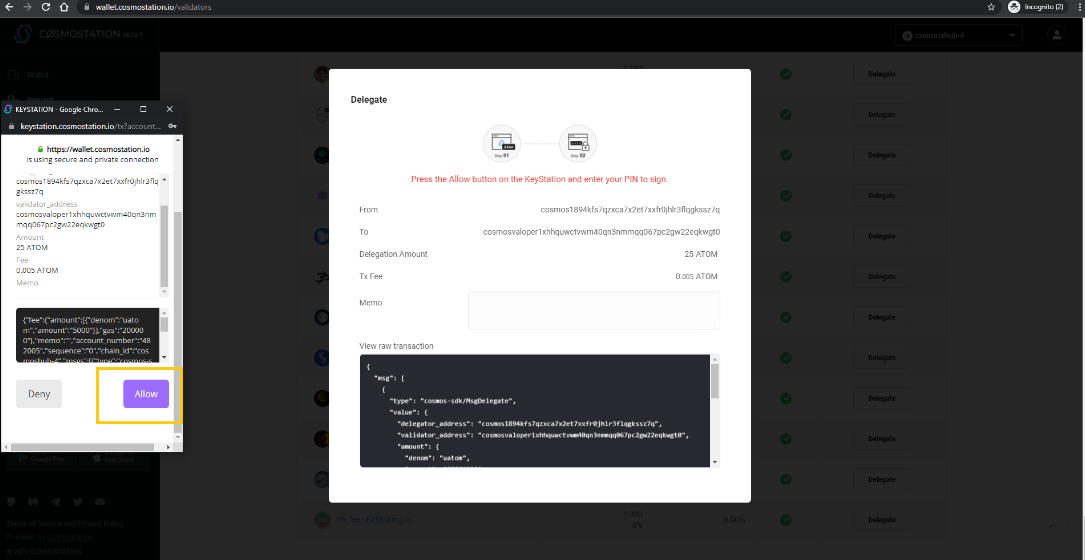
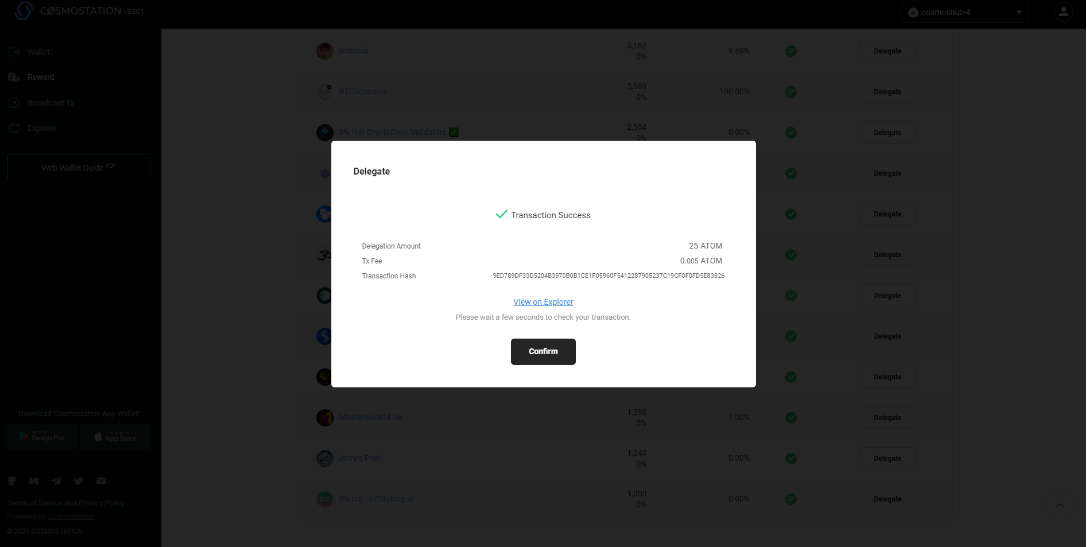
After entering the PIN, you will be able to confirm the delegation by clicking on ‘Confirm’ button:
10. Monitor your delegation
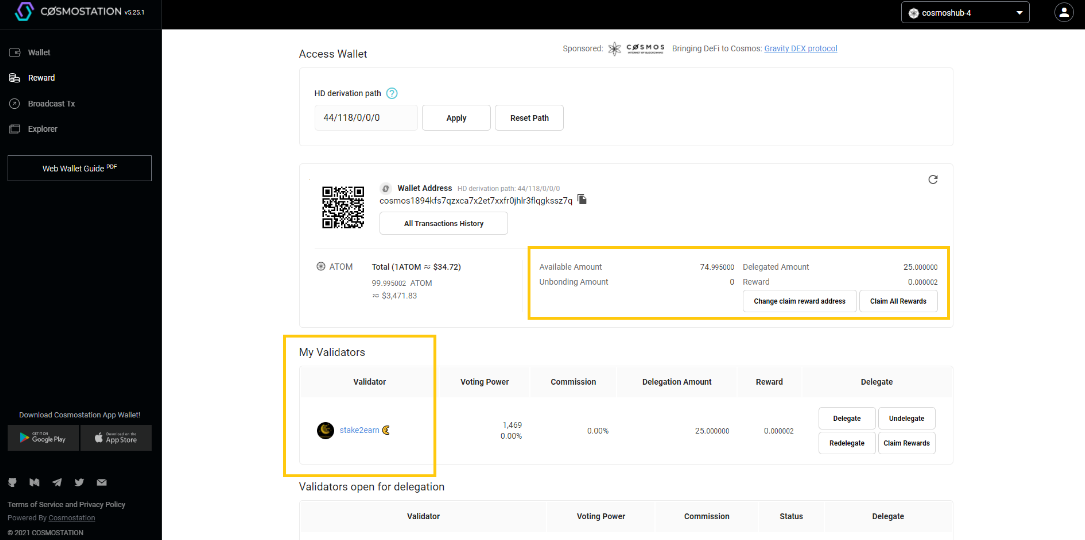
Now, in the ‘Reward’ section you will be able to see the delegation together with the progress in reward.
All is now set to stake, so.. Good luck at staking! 🌜


